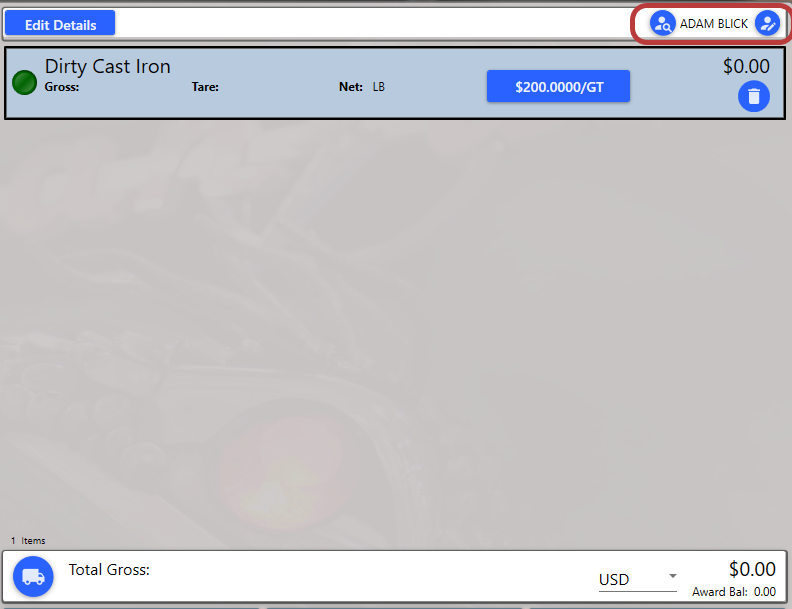

In the left corner of the Buy Screen, above the Ticket Preview area is the Edit Customer button. This is circled in the image below.

Clicking the Edit Customer button opens the Edit Customer screen.
General Tab:
In the top left corner an image of the customer, the customer number and the customer's name are displayed. The center of the top bar also shows the date this customer was created and the date this customer was last active at your yard. On the left side of the screen are the different tabs for entering and editing customer information.
In the top right corner you can set this customer as Active or Inactive, enter their barcode, and see what type of customer they are. In this example, the customer is set as a customer. Clicking on
opens a drop down menu with other types; if you wish to change the type of customer then you would do so by selecting an option from this drop down menu.
To edit the customer's address, phone number, email address, driver's license information click the icon next to each heading.
To change the customer type simply check or uncheck the appropriate Radio buttons in the Customer Type box.
You can change the Currency by clicking on the tile.
You can change the customer's Home Yard by clicking on the tile.
You can also choose to Restrict Purchasing from this Customer and Transfer to Accounting Individually by checking the boxes next to each option on the General tab.
Buy Tab:
General Box: This box lists Pay Terms, the Default Pay Method, Extra Scale Tickets and the Pay To. The Pay To name can be selected using the icon next to the Pay To field. Account Manager, Pay Terms, Override Remittance Advice and Default Pay Method can all be changed through their respective drop drown menus.
Exemptions: Exemptions can be added or removed by checking (or unchecking) the radio button next to each exemption.
Special Price Lists: This is where Special Prices for this customer can be created, edited and deleted. You can create a Price List using the button. At the top you can choose to restrict the menu that appears for the customer to the price list. You can use the buttons at the bottom of this box to Add a Price List, Edit a Price List, View Quotes and View PO's for this customer.
Check information and employer information can be edited using the icon at the top of each box.
You can also view the Loyalty reward level and the customer's points balance.
Approval Lists: In the Approval Lists box you can edit, add or delete approval lists, or disable them by clicking the check box in the Disabled column. By clicking the icon you can see who has approval privileges. Approval lists can be deleted using the
icon. Approval lists can be edited using the
icon. You can create a new approval list by clicking the
icon.
Sell Tab:
General Box: You can choose the Broker/Trader from the options available in the dropdown, set the Bill To using the icon. You can also enter the Federal ID and set the Accounts Payable and Accounts Receivable for this customer.
Special Price List: You can use this box to set special prices for this customer. You can add a price list using the icon and delete a price list using the
icon.
% Tax Box: Use this box to set which taxes this customer is eligible to pay.
Certificates Tab:
The Certificates Tab is where you can edit, view, renew and add certificates for this customer.
To view, renew or edit a certificate, select it from the list and use the View Scans, Edit, View Certificate or Renew buttons that appear below the certificate in the list.
To add a certificate, click the button on the left of the heading. Enter the certificate information and scan the necessary documents, if applicable, then click
.
Notes Tab:
On the Notes Tab you can enter any notes on this customer. Simply type notes in the Notes box and then click .
Addresses Tab:
You can add, edit or delete addresses on this tab.
To add an address, click the button in the top left of the Addresses box. Enter the address information and then click
.
To delete an address, click the button to the left of an address in the address list.
To edit an address, click the button to the left of an address in the address list.
Contacts Tab:
On the Contacts Tab you can add, edit, delete and view contact information for this customer.
You can add a new contact by clicking thebutton in the top left of the Contacts box. Enter the Contact information and then click
.
To delete a contact, click the button to the left of a contact in the contact list.
To edit a contact, click the button to the left of a contact in the contact list.
To view information for a contact, click the icon to the right of the contact in the contact list.
Vehicles Tab:
You can add, delete, and edit vehicles and trailers on the vehicles tab.
Adding and editing vehicles in the Vehicles tab is identical to the process outlined in the Edit Vehicle page.