First we'll discuss how to establish a new user in the system. Then we’ll get into how to assign positions.
From the Admin Menu:
- Choose Users
 .
.
Note: You can use the search function or press Show All current users so as not to create a duplicate.
- To add a new user, select Add
 .
.

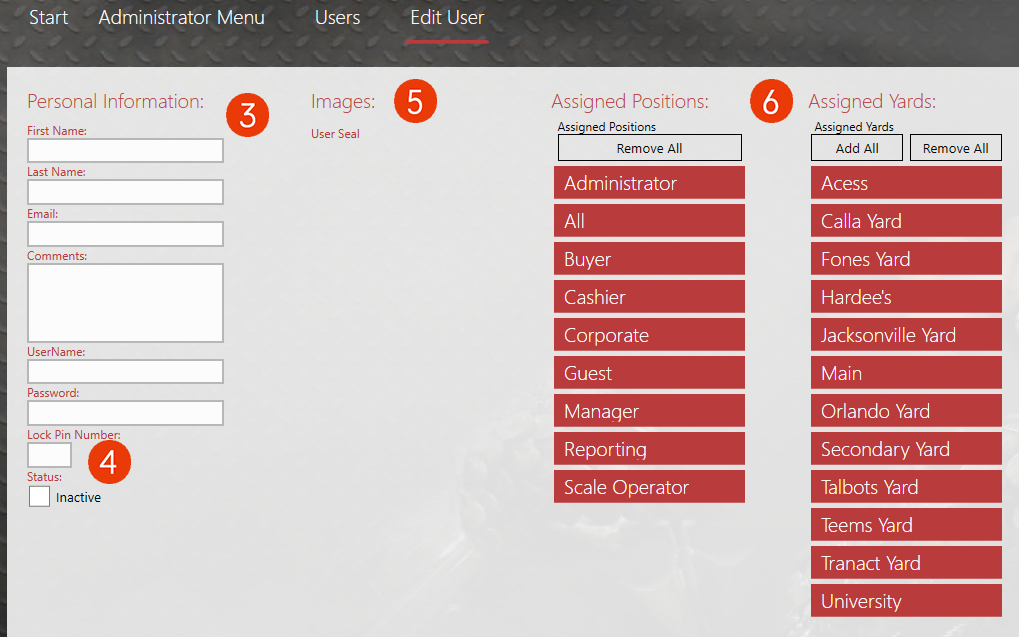
- Now fill in all personal information for the user, including a Username and Password that they will use to sign in.
- Also select a Lock Pin number for anyone who is buying scrap. The operators should lock the screen by choosing the Lock icon when they are not actively using it to allow others to log in with their PIN numbers. This allows for the correct user to be assigned to the tickets that they are working with.
- You can also upload a User Seal here, if applicable, by clicking the Upload User Seal Action Item.

Now we need to assign Positions and Yards to the User.
- Select the Position that the User should be assigned to by double-clicking it.
- Now, select the yard that they will hold that position, by double-clicking it so that it also turns green.
Note: You can have a user assigned to multiple positions at multiple yards if need be. If there is a Cashier that works at more than one yard, you would select the Cashier position and then double-click any of the yards that they need to be assigned to.
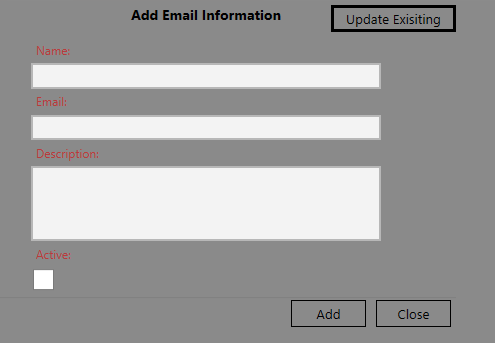
- The last option that you will want to set up for the user is the email address. Entering the email address here will update the distribution list. This will allow for batch report emails to be automatically sent from administrators to users. Select the Email action item.

- Fill in the Name and Email address.
- And select Add.

Now your user is set up with proper security and is ready to get to work!


 .
.
 .
.


