
| Back Office > Master Files > Commodities > Adding a Commodity |
From the Back Office Menu, click and then click
This will open the Commodity List.
To add a commodity, click the button in the top row in the leftmost column. This will open the Edit Commodity screen where you can add a commodity.
In the top left of the screen you can select if this commodity is a commodity or a reward, and set it as a Parent Commodity. You may also select the Yard this commodity is listed at. In the top right, you can set the commodity as active or inactive and see a preview of what the commodity button will look like on menus and in the Button Maker.
General Tab
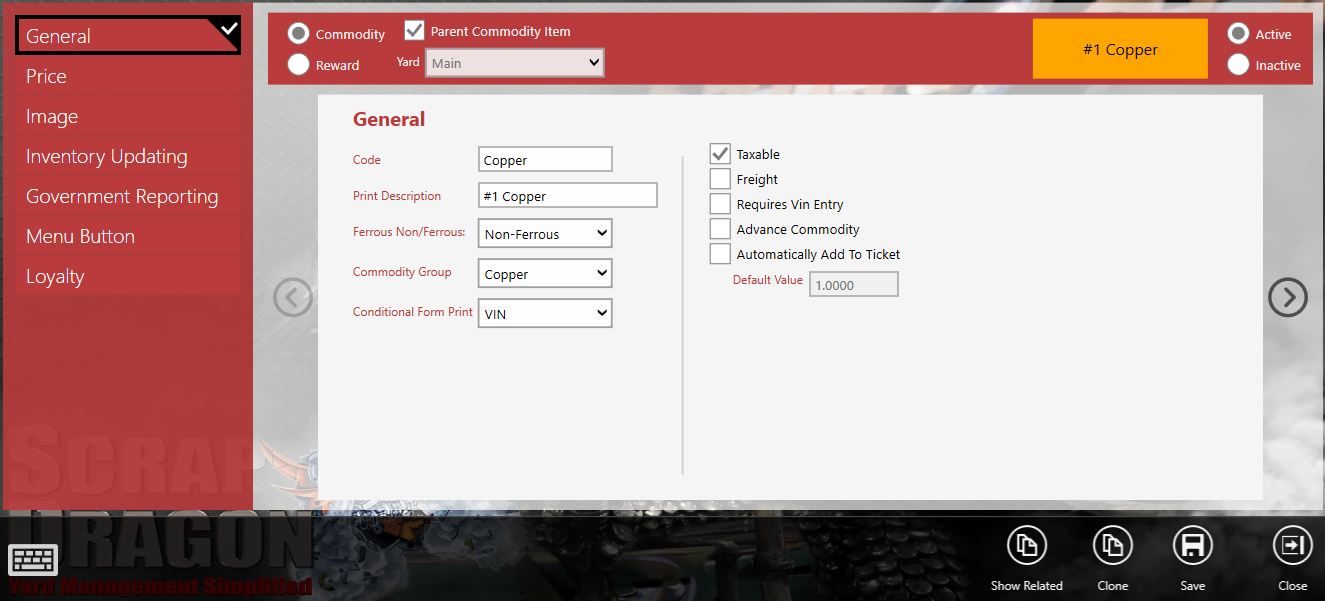
First set the code, print description, group it as ferrous or nonferrous, select the Commodity Group, and if this commodity has conditions, set the condition in the Conditional Form Print. For example, if you're creating an Autos commodity, you'll set the condition as VIN, so that a VIN is printed on the ticket. Then set the default weight.
In the Behaviors section you can set the requirements for this commodity. If it is taxable, or requires a VIN entry, or if this commodity is available for advance tickets. You can also have this commodity automatically added to the ticket when a new ticket is created.
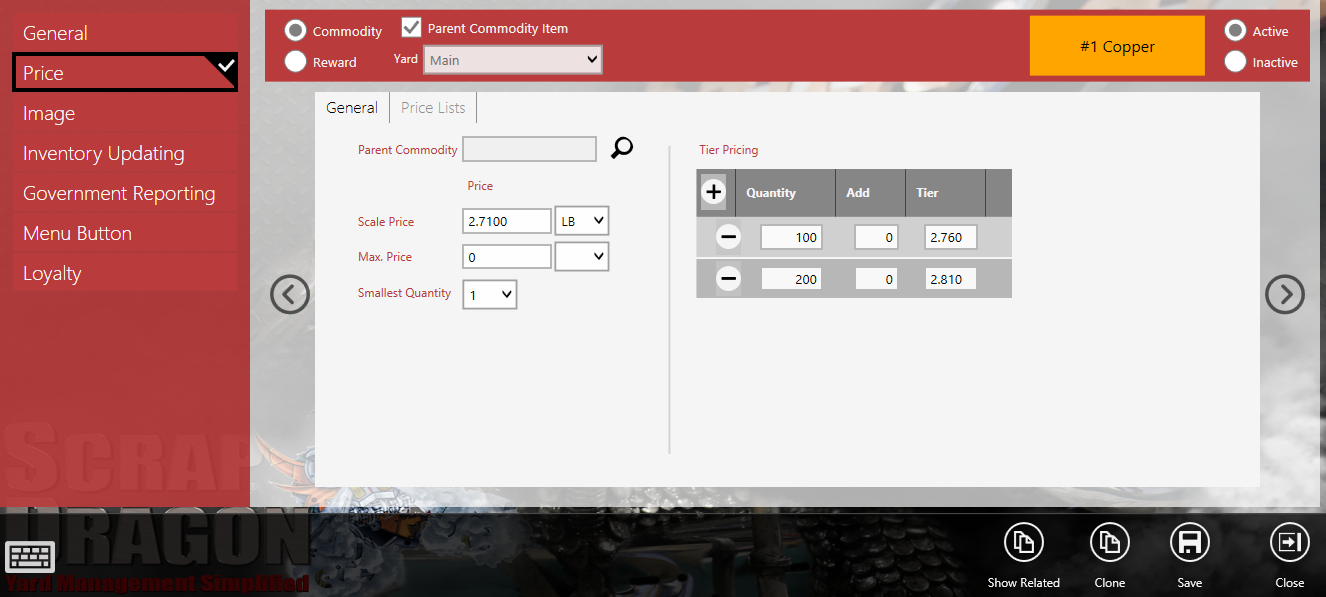
In the Price section, select the Parent Commodity if there is one. Then set the scale price and the Maximum price, and select a Unit of Measurement for each from the U/M drop down menus. If you select "Force Price Entry" then the Price list will appear when the commodity is selected on the Buy Screen.
You can set Tier pricing using the button in the Tier Pricing section. Delete Tiers by using the
button that appears next to the tier you've created.
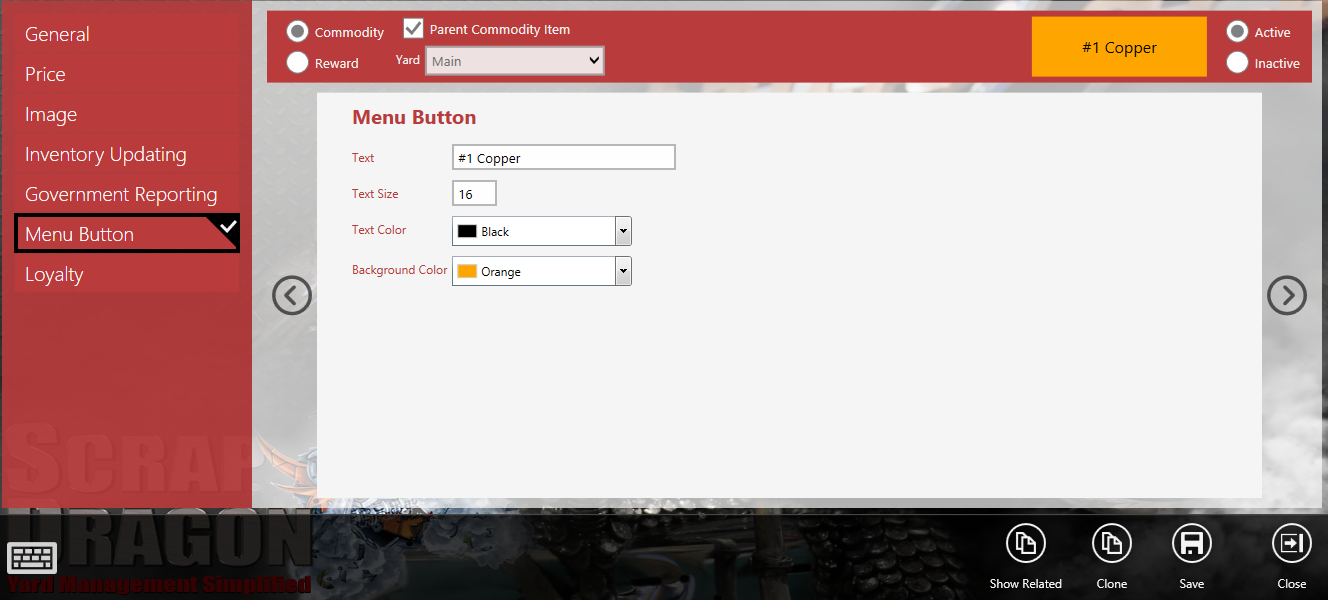
Create the button for this commodity in the Menu Button section. A preview will appear in the blank box in the upper right corner. As a reminder, text size and color should be selected so that the name of the commodity fits entirely on the button and is easily readable on the background color. You can see this in the example below.
|
An example of the Menu Button section in use, with the example following recommended best practices shown in the top right. Click image to enlarge. |
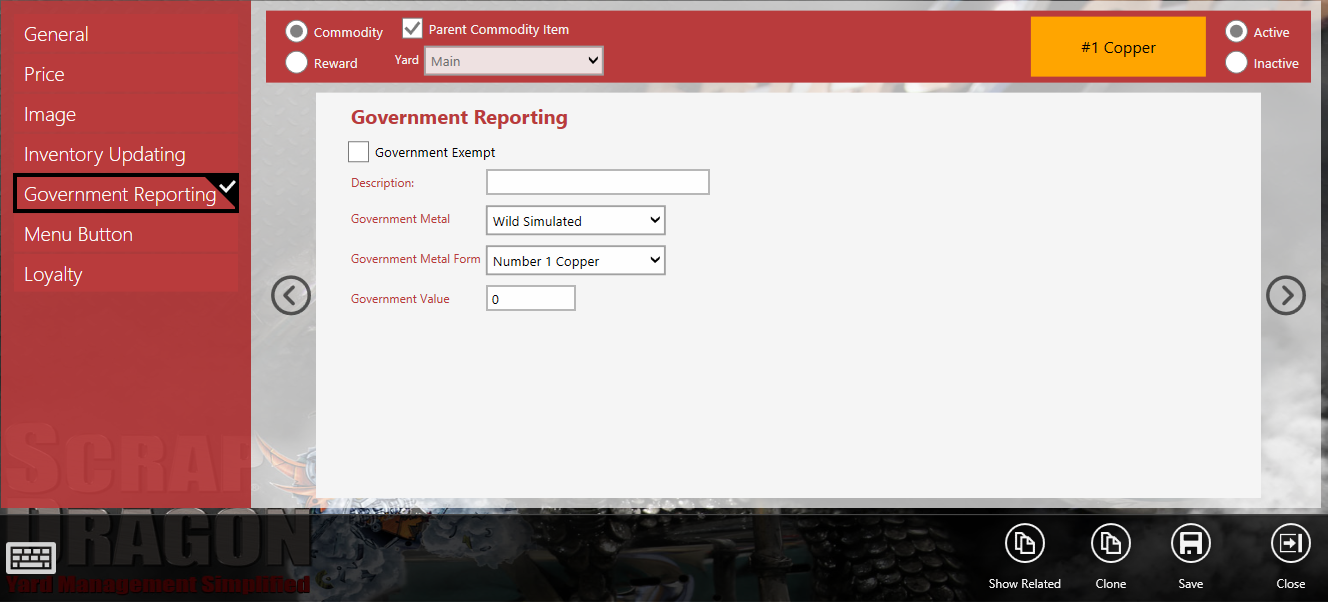
Set up Government Reporting in the Government Reporting section. Choose if the commodity is government exempt, then select the Government Metal and Government Metal Form from the dropdown menu. Set the government value, if applicable.
Price List Tab
Create a price list using the button. You must first save the commodity to add a price list. This will open the Price List Edit screen.
Set the price list using this screen. Assign customers to the price list in the Assigned Customers box. Use the to edit this section. Click the Perpetual radial button if this will always be true for this customer. In the details section, set the name and description and select if this is a Pop-up Price or a Price List by Customer Group using the radial buttons. Set the begin and end dates and add a description. Set the amount, to set an amount for all entries on the Price List, use the
button.
You can Import/Export Price lists from or to Excel sheets using the button at the bottom of the screen.
You can also choose to Duplicate the Price List or Duplicate the Price List to Another Yard using the buttons at the bottom of the screen. When you are done creating the Price List, click Save.
Image Tab
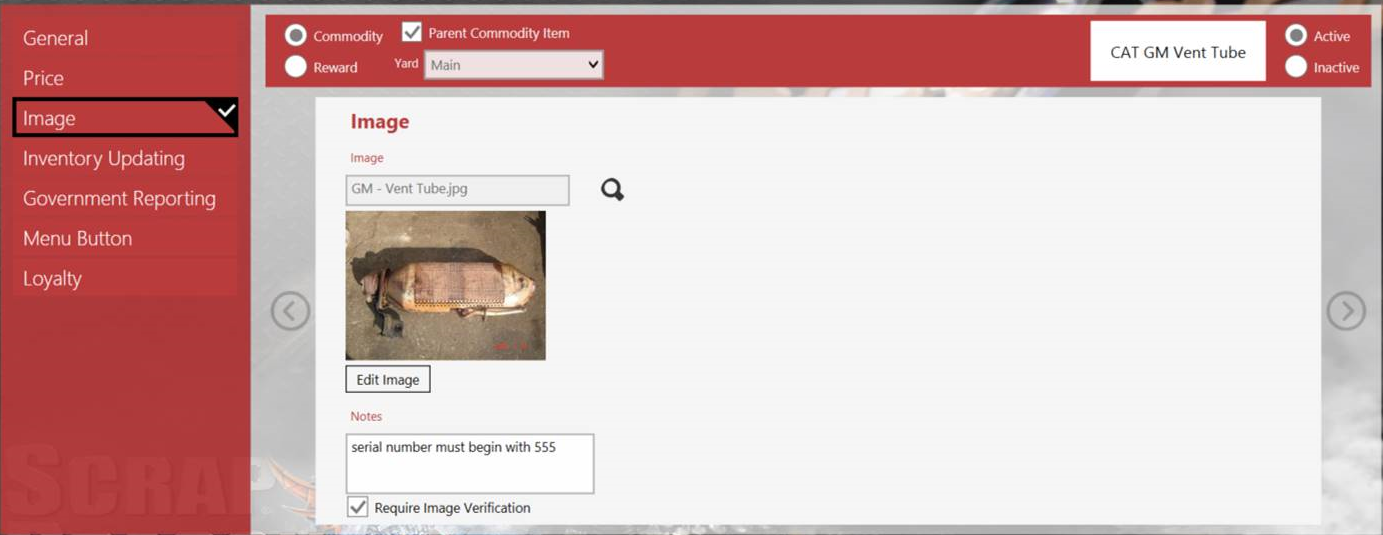
In the Images Tab you can provide an image that will appear when this commodity button is pressed in the Buy Module. Upload an image using the icon and then set type notes in that will appear under the image. Check "Require Image Verification" for this image to appear any time this commodity is added to a ticket.
Inventory Updating Tab
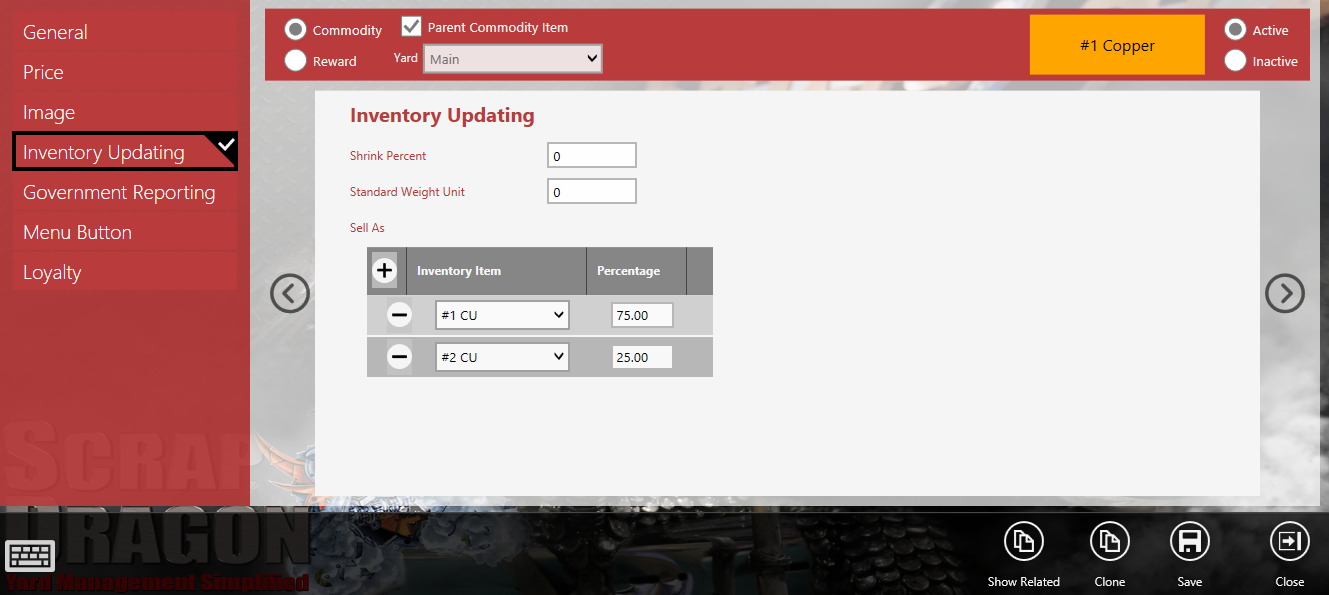
In the Inventory Updating section, set the Shrink Percent, Standard Weight unit, WIP Cost and the Unit of Measurement for the WIP cost.
In the Sell As section, use the button to add an Inventory Item and then click the
to open a drop down list of inventory items you can select. Click Generate Inventory Item to generate the inventory item or create a new inventory item using the Create New Inventory Item button.
Loyalty Tab
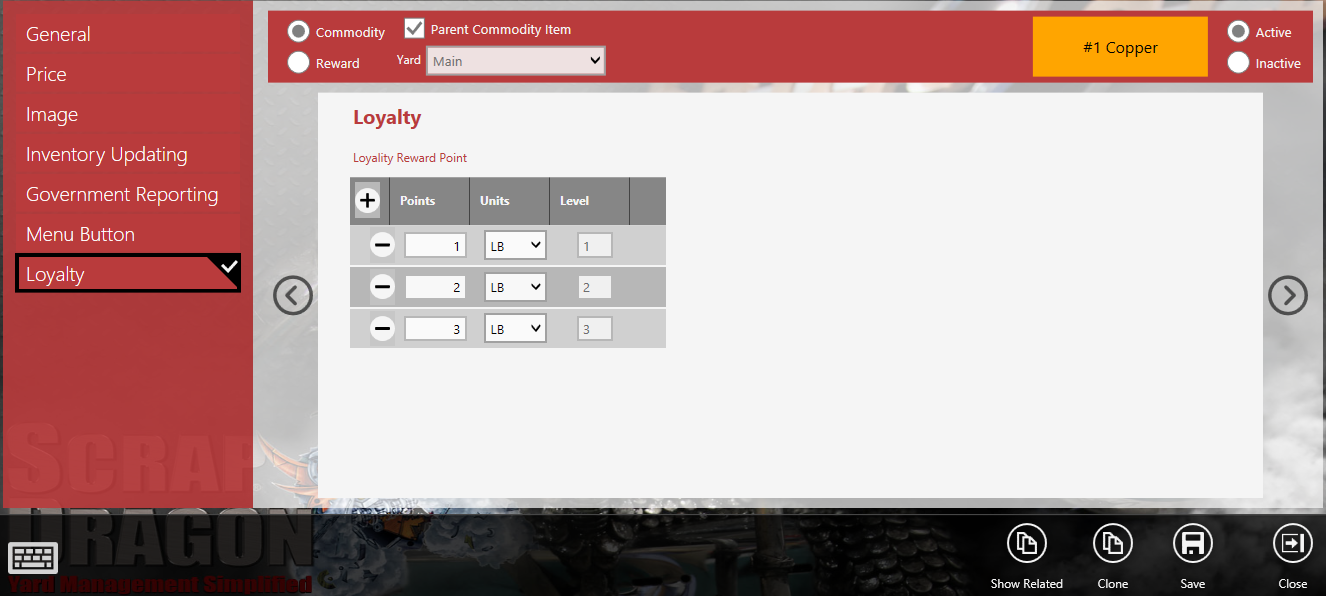
The Loyalty tab allows you to set loyalty points for this commodity. Use the to add a Loyalty tier.
Other Screen Buttons
| Print the price change log. | |
| Show related commodities. | |
| Clone this commodity. | |
| Save changes to this commodity. | |
| Close the screen. |
Let's take a look at each tab to see what you can set up and change for each commodity.
On the General tab you will need to give each commodity a unique Code and print description. Then continue selecting from the General options.
Also on the General tab, the Advance Commodity check box allows you to set up this commodity to be set up as an advance commodity. When the operator attempts to do an advance, he will be asked if he wants to create a receivable transaction. When Yes is chosen, a ticket will be created multiplying the price of the advance commodity by -1 and the two tickets will be linked. If the original advance ticket is voided, the user will be asked to void the corresponding receivable as well.
The Price Tab
Add pricing details. Select a Parent Commodity. Add the scale and maximum price and units of measure. Select the smallest commodity to purchase. Add any tier pricing you want to apply to this commodity.
The Image Tab
Get an image to add it. Edit the image if necessary. Add any notes. Select the Require image Verification checkbox, if applicable.
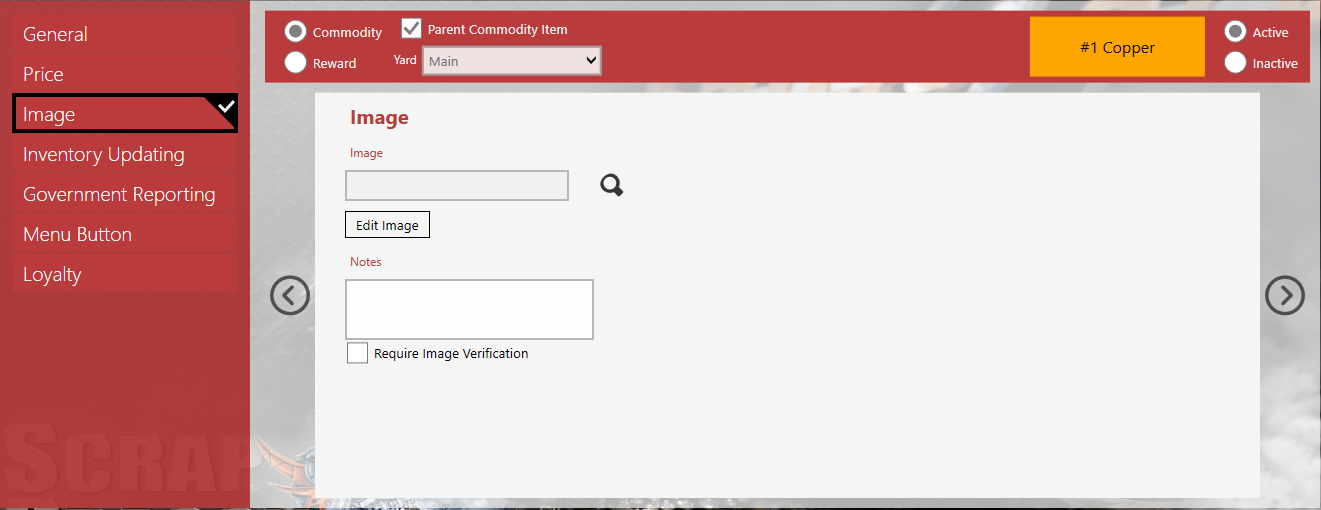
In this example the image and a note has been added. The Require Image verification checkbox is selected.
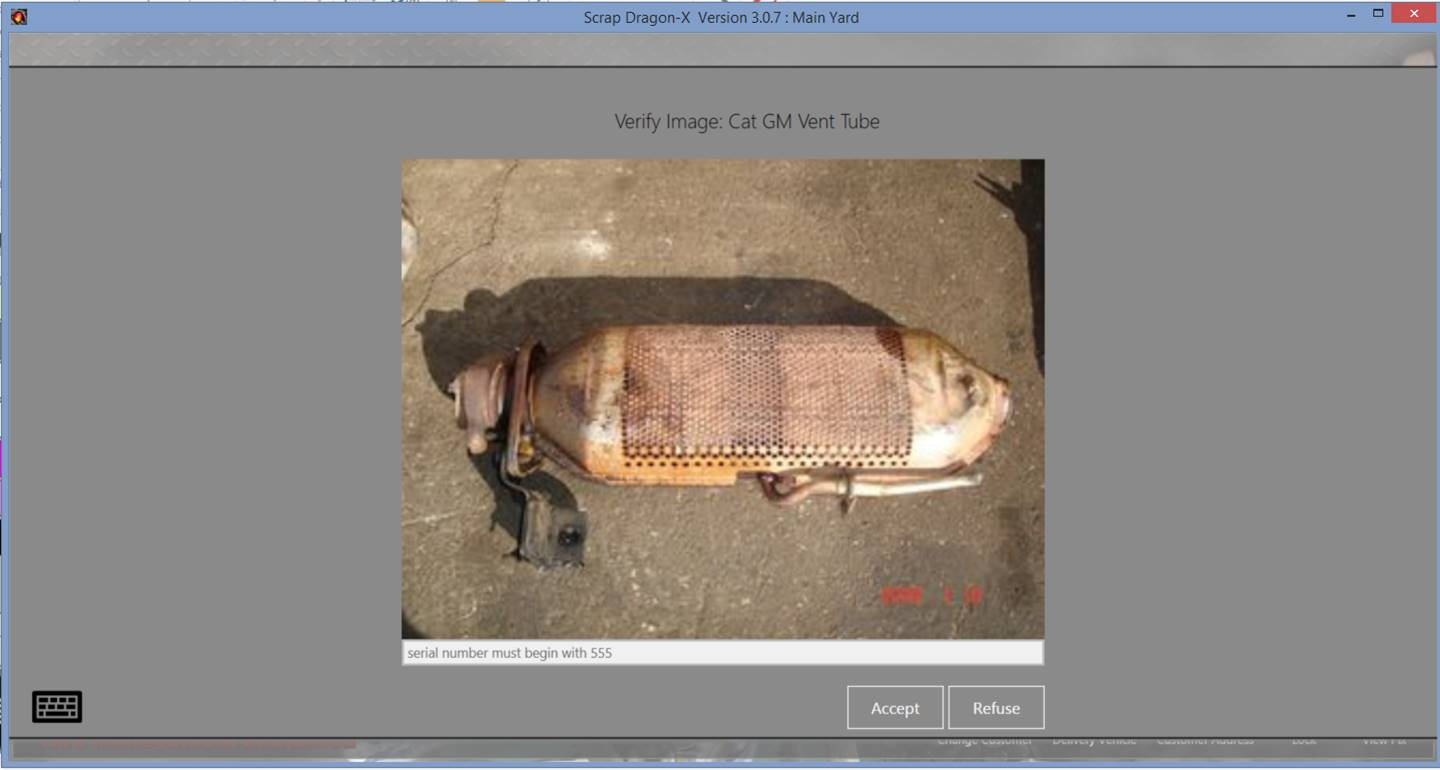
When the operator adds this commodity to a ticket, this image displays and the operator can compare the image to the commodity the seller has brought in before accepting it. This will eliminate commodity errors.
The Inventory Updating Tab
Enter the shrink percent and standard weight unit. Enter the sell as commodities and percentages.
The Government Reporting tab
If this commodity is reported to the government, choose the description, government metal, government metal form, and value here.
The Menu Button tab
Setting the menu button text, background and text color here saves you time when creating menu buttons.
The Loyalty tab
If there are loyalty rewards for this commodity, set the pints, units and reward levels here.
