The Peripherals tab is where the configuration/devices for data capture, signatures and the scale configuration are set up. Every profile should have at least one scale attached to it or it cannot take a weight.
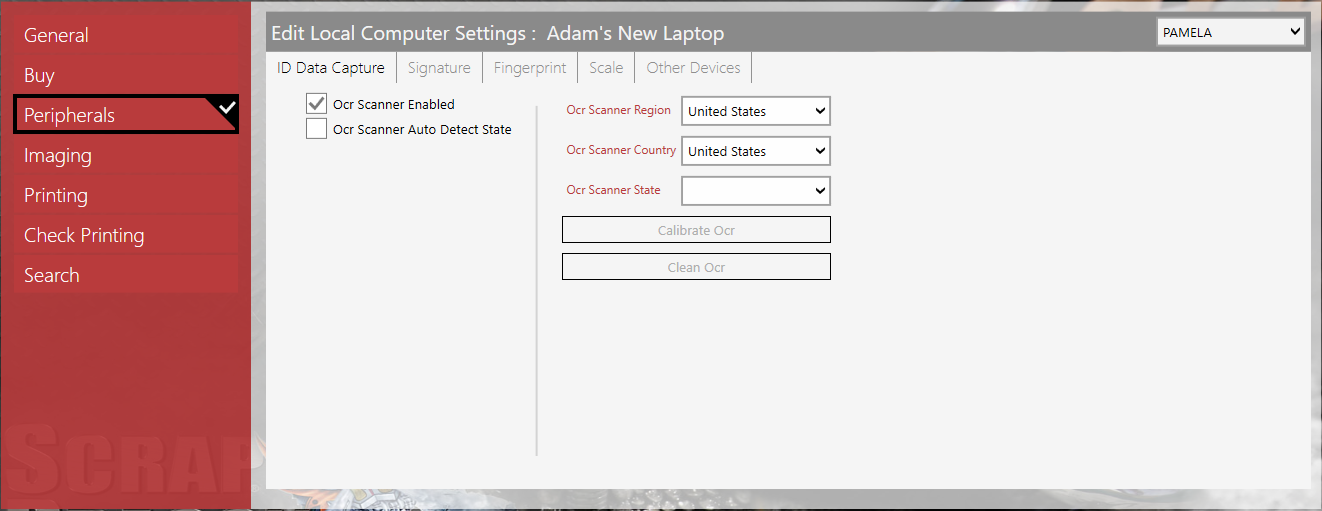
On the ID Data Capture tab,
- Select the checkbox if you have an OCR Scanner.
- Select Auto Detect State to have Scrap Dragon automatically detect the state of the OCR scanner.
- Select the region, country and state.
- Touch the Calibrate Ocr button to calibrate the device.
- Touch the Clean Ocr button to clean the device.
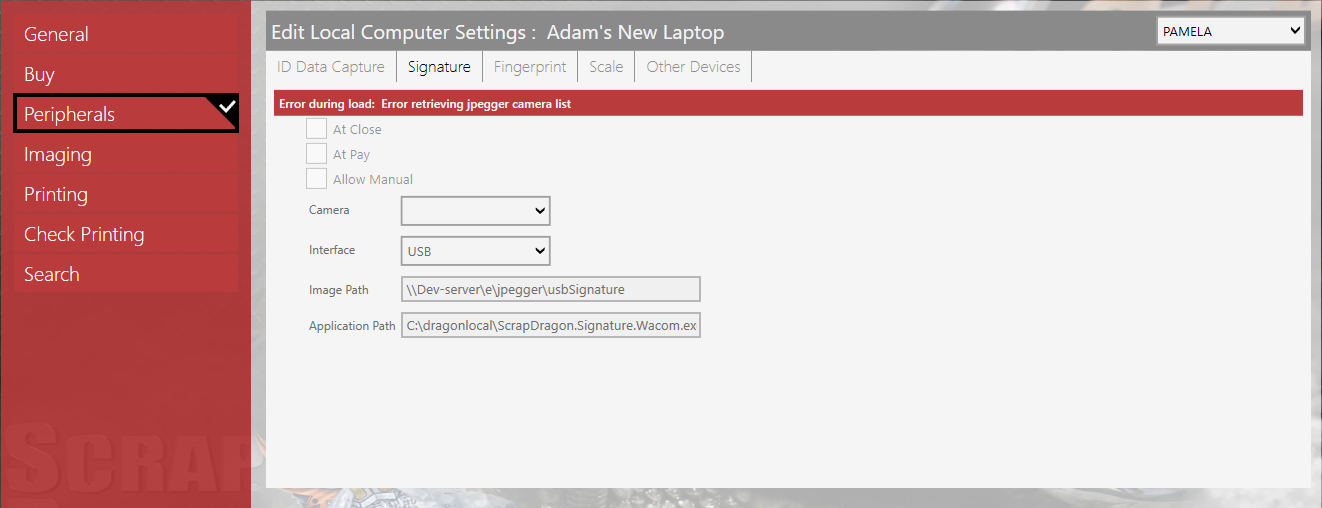
On the Signature tab,
- Select the At Close checkbox to have the signature image taken when a ticket is closed.
- Select the At Pay checkbox to have the signature image taken when a ticket is paid.
- Select the Allow Manual checkbox to allow images to be taken manually.
- Select your camera from the drop down.
- Select the type of interface used from the drop down.
- Set the path for retaining signatures and the application path.
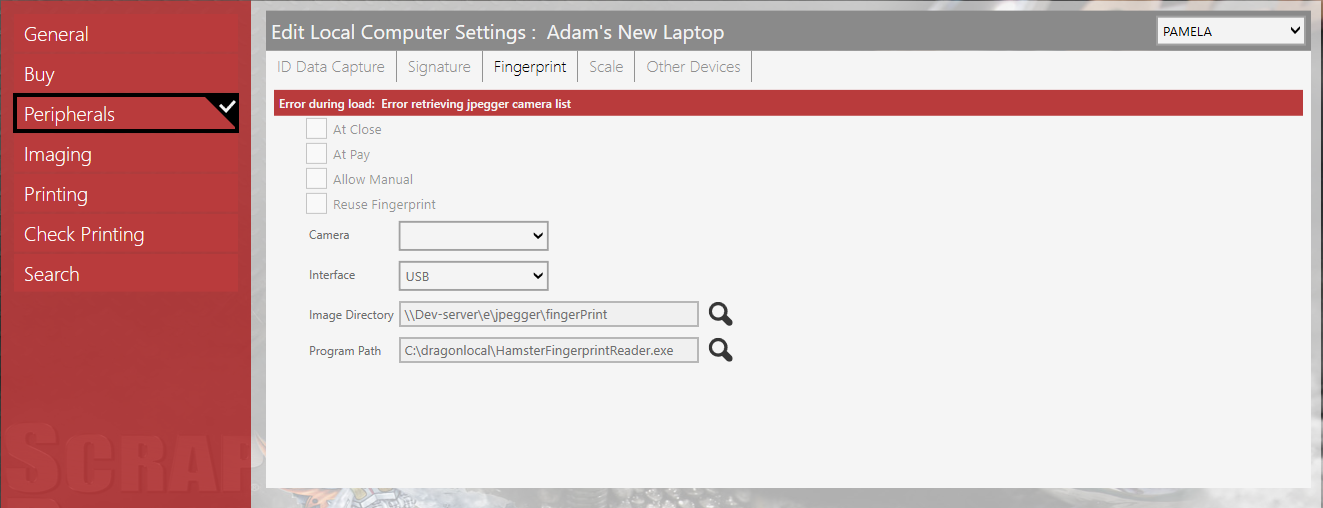
On the Fingerprint tab,
- Select the At Close checkbox to have the fingerprint image taken when a ticket is closed.
- Select the At Pay checkbox to have the fingerprint image taken when a ticket is paid.
- Select the Allow Manual checkbox to allow images to be taken manually.
- Select the Reuse Fingerprint is you wish to reuse the fingerprint. Most jurisdictions require that a fresh fingerprint be taken with every ticket.
- Select the Camera from the drop down.
- Select the camera interface from the drop down.
- Set the path for retaining fingerprints and the application path.
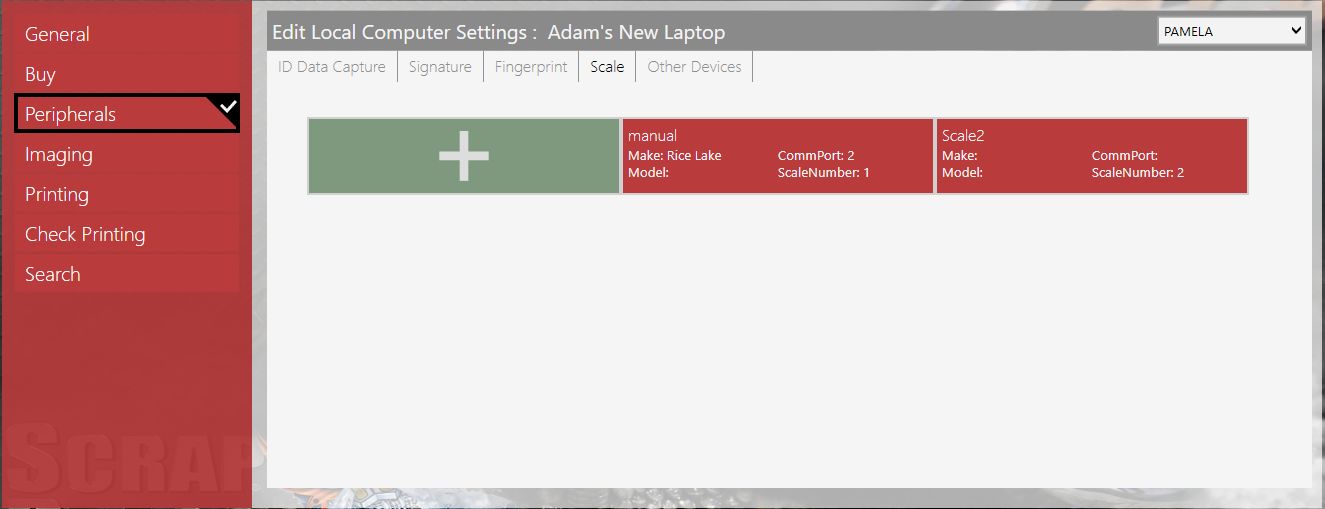
On the Scale tab, touch the Plus (+) button to add a scale.
Click on an existing Scale to edit settings for that scale.
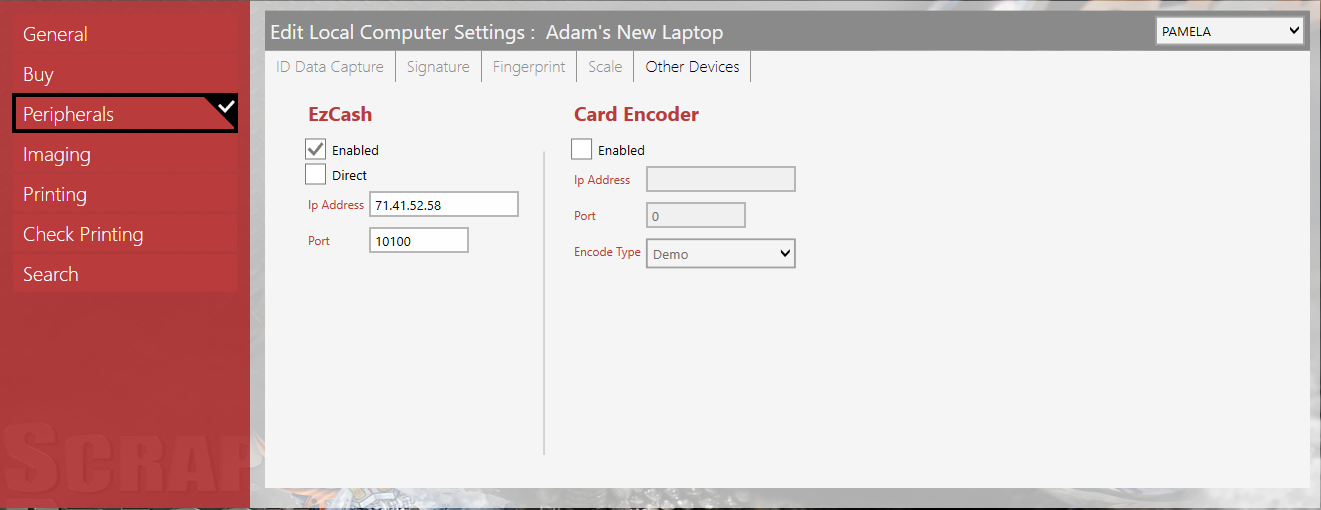
On the Other Devices tab,
- Select the Enabled checkbox to enable EZCash.
- Select the Direct checkbox to enable direct pay.
- Enter the IP address for the EzCash.
- Enter the port.
- Select the Enabled checkbox to enable the Card Encoder.
- Enter the IP address for the EzCash.
- Enter the port.
- Select the Encode Type from the drop down.